Windows 8, 8.1, and Windows 10 users..
New Edit 17 April 2017
Some users have reported problems with the keying using Windows 10, and external key, including Paddle key, using the USB to Serial Converter, or even on the serial port of a Desktop or Tower system.
To resolve this issue, there is a "workaround"... please visit PAGE 7 of this blog, "Keying with a mouse adapter" for keying on Windows 10
Using the USB to Serial Converter.
According to the PLUGABLE site... you should have the correct driver downloaded, as soon as you plug in your PROLIFIC PL2303 USB TO SERIAL CONVERTER....
.... however, if you still want to get the driver.... visit this site... BUT READ ON FURTHER DOWN.... BEFORE DOWNLOADING DRIVER...
http://plugable.com/drivers/prolific
IMPORTANT.....
If you are using other manufacturers usb to serial converter, then you need to check with PL2303 CHECKCHIP TOOL.... to make sure that your item has the correct chip inside... otherwise it may not work properly.
NOTE: -
Windows 8, 8.1, and Windows 10 are NOT supported in the PL2303HXA AND PL2303X EOL chip versions.
The latest chip version that IS
supported is PL-2303HXD (version HX revision D)
or PL2303GTA
chip.
PL2303 CHECKCHIP TOOL http://www.prolific.com.tw/US/ShowProduct.aspx?p_id=225&pcid=41http://www.prolific.com.tw/US/ShowProduct.aspx?p_id=225&pcid=41
From the Plugable page.... this warning....
Warning Notice:
Please be warned that counterfeit (fake) PL-2303HX (Chip Rev A) USB to Serial Controller ICs
using Prolific's trademark logo, brandname, and device drivers, were
being sold in the China market. Counterfeit IC products show exactly the
same outside chip markings but generally are of poor quality and causes
Windows driver compatibility issues (Yellow Mark Error Code 10 in Device Manager). We issue this warning to all our customers and consumers to avoid confusion and false purchase.
If you are having problems getting CWCOM to work, then..... use the PL2303 chip check as above... to make sure your chip is the HXD version... not the HXA version....
COMPATIBILITY MODE
You can also Try "compatibility mode"..... to do this...
START > type in CWCOM in the box above Start....
or find the cwcom. exe file in your cwcom folder.
Right click on the CWCOM icon, and find " Open File Location"... in the drop down menu.
Left click on that... Then Right click on the CWCOM icon again..
click on Properties,
. to find "Compatibility" tab...
.. Then check the box at "run this program in compatibility mode
for....."
click on the arrow to get the drop down list....
of previous
Windows O.S. and I suggest you use Windows 7 or Windows Vista as
compatible modes.... and I hope that works for you.... Good Luck... ).
Showing posts with label https://morsepower.blogspot.co.uk/. Show all posts
Showing posts with label https://morsepower.blogspot.co.uk/. Show all posts
Sunday 14 August 2016
CWCOM - CONNECTING A MORSE KEY
This section covers how to connect a key, and what settings to use to get it working on cwcom .
EDIT .. ( 27 MAY 2019 ) A TOUCH KEYER CIRCUIT HAS BEEN ADDED TO THE END OF THIS PAGE....
Windows 10 users.... check out the Page 7.. Keying with a mouse ..... for an alternative way to connect your key... especially if you use paddle/iambic key or experience keying delays on sound and text.
If You use your key on a HF transceiver, it will probably have a line jack plug on it..... so you need to wire a Line Jack Socket ( stereo type) phone connector to the DB9 socket.... as shown below.
If you use a Laptop as your main computer,.... you will need a USB to Serial Converter (as in pic below). A DB9 socket, and an "In - Line Stereo Phones jack socket"
Or ,....you can make up a "mouse adapter" see page 7 "Keying with a mouse".... of this blog for detailed instructions.
You can purchase a USB to Serial Converter (PL2303) on ebay, Amazon, or direct from Prolific, in the USA... however...
Windows 8 Windows 8.1 and Windows 10 users should be aware of this warning.....
NOTE:
Windows 8/8.1/10 are NOT supported in PL-2303HXA and PL-2303X EOL chip versions.
Run PL2303 CheckChipVersion tool program in Windows XP/Vista/7 to check chip version.
Windows Vista, XP, 2000, 98 and Windows ME driver technical support are discontinued.
Prolific recommends to use
PL-2303HXD (HX Rev D) or PL2303TA chip.
PL2303 USB to Serial Converter "should" be Plug and Play... your computer should automatically find the driver for it.


Landline Sounder users......
If you are intending to use a "Sounder" as on the old "landline/railway telegraph" you can make up an interface from the circuit diagram below
Please read the note below the schematic.....
and observe the "new" circuit layout

Here is his website page... (click the linky
http://members.westnet.com.au/page3/touch_keyer_interface.htm
Thank you Grant....
If anyone has any other useful ideas..... please email me... and I will see if they are appropriate to add to this page. (or a new page ! ).
EDIT .. ( 27 MAY 2019 ) A TOUCH KEYER CIRCUIT HAS BEEN ADDED TO THE END OF THIS PAGE....
Windows 10 users.... check out the Page 7.. Keying with a mouse ..... for an alternative way to connect your key... especially if you use paddle/iambic key or experience keying delays on sound and text.
If You use your key on a HF transceiver, it will probably have a line jack plug on it..... so you need to wire a Line Jack Socket ( stereo type) phone connector to the DB9 socket.... as shown below.
If you use a Laptop as your main computer,.... you will need a USB to Serial Converter (as in pic below). A DB9 socket, and an "In - Line Stereo Phones jack socket"
Or ,....you can make up a "mouse adapter" see page 7 "Keying with a mouse".... of this blog for detailed instructions.
You can purchase a USB to Serial Converter (PL2303) on ebay, Amazon, or direct from Prolific, in the USA... however...
Windows 8 Windows 8.1 and Windows 10 users should be aware of this warning.....
NOTE:
Windows 8/8.1/10 are NOT supported in PL-2303HXA and PL-2303X EOL chip versions.
Run PL2303 CheckChipVersion tool program in Windows XP/Vista/7 to check chip version.
Windows Vista, XP, 2000, 98 and Windows ME driver technical support are discontinued.
Prolific recommends to use
PL-2303HXD (HX Rev D) or PL2303TA chip.
PL2303 USB to Serial Converter "should" be Plug and Play... your computer should automatically find the driver for it.
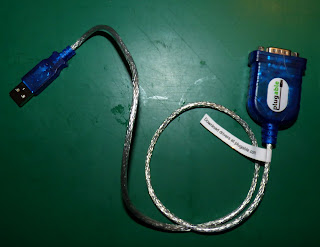
"Plugable" USB to Serial Converter lead
 Most keys have a 3.5 or 1/4" jack already

wired, and so,you will need to make a
"rats tail" connector, rather than re-wire
your key to use on cwcom.
You will need .....
a DB9 socket and...
a Stereo in-line jack socket....
and a short piece of 3 core cable,
as used on `phones
It is important that you get the pin numbers correct, and you should be able to see them on the “face” of the DB9 socket.

Although you may need a magnifying glass ! !

It is also important to make sure the line socket connections are the same as the jack plug, otherwise your straight won`t work properly...

You can use an unused jack plug into the line socket to check the continuity of the connections and all the way back to the DB9 socket, with a multimeter, ( or battery and bulb with a length of wire ! ).
Depending on the key you use,
depends on the connections to the DB9….


Straight keys connect only two connections…( pins 4 & 6 ) ...

 Paddle keys require three….

DB9 – 9 Pin Serial Port Connection
- Pin 6 - manual key or left paddle
- Pin 4 - manual key or common
- Pin 8 - right paddle
- Pin 7 - Sounder Output (This pin - RTS - goes high with morse input/output)
- Pin 5 - Sounder Ground
DB25
– 25 Pin Serial
Port Connection (straight keys only connect pin 6 & 20 )
- Pin 6 - manual key or left paddle
- Pin 20 - manual key or common
- Pin 5 - right paddle
- Pin 4 - Sounder Output (This pin - RTS - goes high with morse input/output)
- Pin 7 - Sounder Ground

Here is an edited photo of my set-up to show how all the bits and pieces come together. 

********************************************************************************Setting up the computer....
Once you have done the soldering... ( and checked all the way through!)..
You need to set up the laptop to recognise the USB to Serial converter.
this is normally automatic on WINDOWS ...
( but see Linux and MAC pages for special instructions on how to set the comport nummber) when you plug it into the usb port.
It should automatically find the driver and install that too !!
Setting up the COMPORT number
(Linux and Mac users see your special pages on this blog)
After plugging in the USB converter, it should be automatically recognised,
however, in the settings on the Configurations window, you need to specify
COMPORT on the Morse Key tab... it may not "recognise" it, so you will
need to find out which comport number is allocated.
 so here is how to do that....
^^^^^^^^^^^^^^^^^^^^^^^^^^^^^^^^^^^^^^^^^^^^^^^^^^^^^^^^^^^^^^^^^^^^
Finding the COM port number..... (Windows operating system)
 Plug in the USB/serial adapter

 go to "Start"  > Control Panel > Device Manager > Ports (COM & LPT)


Expand that ( click on the + sign)... and, hopefully, you will see
your USB /Serial adapter ( mine is listed as Prolific USB-to-Serial
Comport (COM2) .. you may have a different number assigned,
but that is the number you will need..
Go to the CWOM configuration window click on the Morse Key
tab , and set that number in the COMport window'
Note... Any number above 14 will not work. So you may need to
reset the COMport number..... as follows...
Resetting the COMPORT NUMBER
  as above.... START > Control Panel > Device Manger > Ports ( COM & LPT)

Right click on Prolific USB-to-Serial Comm Port...

and then click on Properties

 Click on the "Port Settings" tab.

 then on "Advanced"
In the window you will have the current COMport number
(it may show "in use" which may be true ... or not ! ! ! ).
If you want to use COM port 6 just change it, (as below) and
see if it works ( it probably will! )
you can change this by using the little down arrow box...
and highlighting another number....

I suggest you use number 6 ( or any other number not "In Use" !)
 Then EXIT every window by clicking " OK  "
*******************************************************************************


So now your are ready to go….
Call up CWCOM and click on the Icon to the right of the A
on top of the screen, this is the "Configurations" window.
You will need to do this every time you start CWCOM.
You should not need to reset the comport number as it is
automatically selected.
Set your Morse Input to COMport
Set your "Morse Key" to the type of key you are using
i.e Manual = Straight key and use "Reset Method"
Iambic = Paddle keys, sideswipers etc (incl. mouse) and
use "Looping Method"
Uncheck Dit Memory
If your keying produces TTT T TTT T TTT TTTTT TTT
or corrupted letters ( not what you are sending ! ). then you
will need to check your "Transmit" speed ...
(You can do this on the CONFIG window ( icon to right of black
letter A at top of screen)
Usually this occurs when using the down arrow key..
(it needs to be set less than 10wpm )
Reset the speed to what you think your normal transmit speed is,
then try again. You may need to do several test runs of
"Brown bread tastes best with butter and strawberry jam" until
it shows a good copy.
Once you have a good copy on screen, then for straight keys
can put at check mark in the LOCK box.. and write down the
speed settings for future reference, if you need to reset them.
^^^^^^^^^^^^^^^^^^^^^^^^^^^^^^^^^^^^^^^^^^^^^^^^^^^^^^^^^^^^^^^^^^^^^^^^^^^^^^
(NOTE>..... you do not need to "connect" to the internet
to do practicing.... just click your mouse cursor on the
screen... your practice will only be heard and seen by you
To chat to other users... you will need to connect
to the internet.
On the top of the screen.. click on the blue world icon
A new window will open showing connection details..
channel 1000 is the default ( calling ) channel, and your
I.P address number will be in the Callsign box window
If you have a Ham Radio Callsign, you can enter it there,
and it will show whenever you are sending, If you do not
have a ham call, you can make one up using your initials
or your name.
click "Connect".. and you should see
DE IONOSPHERE Connected
on your screen...
You may also see other stations that are working,
so please be patient, and hopefully they will see your call, and ask
you if you want to join in, or they may decide to qsy to another channel
When you have finished with cwcom,.. you should always click on the
world icon and "Disconnect" before clicking on the X at the top right
of the screen to close down cwcom properly.
Doing this, clears your call, from the "webview" of all users....
IF all that goes according to plan.... then you will be able to
communicate using very old digital sending equipment, as they did
on the original internet in the late 1800`s.. on the modern version of
internet, today !... how about that for "progress" ? ?
**************************************************************
Landline Sounder users......
If you are intending to use a "Sounder" as on the old "landline/railway telegraph" you can make up an interface from the circuit diagram below
Please read the note below the schematic.....
and observe the "new" circuit layout
The
serial port provides
output pins that can be connected to a Sounder (early Morse receive
device) or
used for an external flashing light. Here is the interface Circuit you
can use:
This circuit was taken from the original help page on the CWCOM main window icons. (See the updated version below)

Updated version.... 27 January 2019
Courtesy of Frank
As drawn the 1N4005 will not protect the 2N2222 keying transistor from the positive voltage
spikes which appear at the collector whenever the transistor is turned off.
This situation is normally addressed by use of a "free-wheeling diode" as drawn on the
attached amended schematic. The free-wheeling diode as drawn limits the maximum
collector voltage to the supply voltage plus one diode voltage drop (say Vsupply + 0.7V).
Be aware that there will be a very slight increase in the sounder / relay's release time
however this is unlikely to be noticeable even at the blazing Morse speeds some are capable
of and will certainly be less noticeable than a failed 2N2222.
revised circuit, showing differences


WARNING... Be very careful connecting this circuit to your serial port or adapter
GND & RTS use different pin numbers, depending on whether it is 9 pin or 25 pin
Enjoy your new program.. and Enjoy Morse !
Good Luck... and 73`s DE G3MS va dit dit
******************************************************
HERE IS A "TOUCH KEYER" CIRCUIT,
AS PROVIDED BY GRANT/VK2GEL
Thank you, GRANT !.
I have received an interesting email from Grant/VK2GEL in Australia.
He has designed a small PCB to accommodate a few components, and make a
nice little tidy interface for Touch Keyers.Here is his website page... (click the linky
http://members.westnet.com.au/page3/touch_keyer_interface.htm
Thank you Grant....
If anyone has any other useful ideas..... please email me... and I will see if they are appropriate to add to this page. (or a new page ! ).
Subscribe to:
Posts (Atom)